Learn To Draw Fashion Figures
Learn To Draw Fashion Figures – Fashion illustration is a skill that develops over time with patience and practice. Perhaps the most beneficial part of learning to draw fashion figures is being able to sketch fashion design ideas in a simple and easy-to-read way.
Let’s face it, the concept of drawing clothes on fashion figures can seem quite intimidating. However, you don’t need a degree in fashion design to learn how to design your own clothes and effortlessly sketch ideas on paper.
Learn To Draw Fashion Figures

The good news is that there are some simple steps you can take that will help you avoid some of the confusion surrounding proportion and movement and allow you to focus and prioritize when drawing clothes. Before you finish sketching clothes, it is important to know how to draw a fashion figure. Drawing the picture first and then altering it with your design ideas will not only help you bring the garment to life, but also allow for an easier sketching process and an understanding of the basic fabric, adaptation and movement.
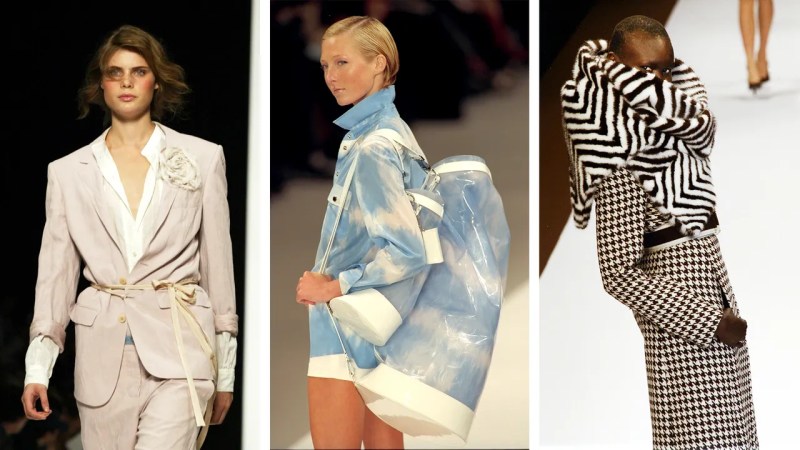
Poses For Fashion Illustration
Coated figures differ from ordinary figure drawings in that they are more dramatic and less detailed representations that feature greater movement and size. Fashion figures can actually take any shape you want in terms of style, so you can express your style artistically. Often, the style of your fashion sketches reflects the style of the clothes you design. As a beginner, don’t stress too much about finding your style right away – it happens naturally over time whether you put in the effort or not. For now, focus on learning the basic proportions and movement concepts outlined below, which will hopefully set you on your way to finding your own drawing style over time.
As mentioned above, a good fashion image should be able to capture the movement of design and fabric that you envision. If you learn some basic concepts of proportion, balance and movement, you’ll be able to sketch a fashionable figure in minutes. As you practice, you will find what works best for you and your drawing style.
Practice makes perfect. Keep practicing until your hands are loose and you are confident with the pencil and work surface.
Don’t be afraid to make mistakes. -You can bend the rules! Try different things regardless of what the “rules” tell you. This is important to find your comfort level and ultimately develop your own style.
Make Fashion Sketches In 5 Minutes #sketchin5 (sketch 2)
Practice drawing continuous lines with different widths and pressures. Try not to draw multiple dashed lines to form one continuous line. This can get a bit messy and doesn’t allow you to get loose when sketching.
Take it with a smile. Impressions of simple lines that capture movement and overall proportions are often enough to make a sketch of a fashion figure look finished.
1. Draw a subtle curved vertical line in one continuous motion. Don’t worry about straight or curved lines, just vertical lines. This will be your vertical balance line.

Traditionally, the vertical line of balance is a straight line that defines the balance of the figure and the position of the feet. To make it a little easier, we bend the rules and make this line semi-curved. This semi-curved line will allow you to draw the right balance in the fashionable figure, but it will also help you get more movement of the figure easily, especially if you are a beginner.
Learn To Draw Professional Fashion Figures In Four Weeks!!!
The traditional rule of the vertical balance line is: Both feet cannot be placed on the same side of the line or it will make the image look like it is falling. Each foot should be placed on the opposite side of the vertical line. It is perfectly fine if one foot touches the vertical line as long as most of the foot’s surface remains on the opposite side of the line from the other foot.
The same rule applies to the semi-curved vertical balance line shown above. However, it is very good if the legs cross a little more on the opposite side of the line. You can usually judge the position of the feet by the movement of the fashion figure that will be shown below.
Next, draw a sloping horizontal line less than half the distance down from the top of the vertical line as shown in the image below.
Again, don’t worry about measuring the exact distance as long as the horizontal line is higher than the middle of the vertical line. This will be the waist line.
How To Draw A Fashion Croquis?
Don’t worry about the length of this horizontal line. Just freehand a continuous line to make sure it’s slightly slanted.
As you will learn below, the direction of this horizontal line (waist line) is oblique affecting the movement of the body and the work of the hands with the line of the shoulders.
3. From the horizontal line you just drew (waist line) divide the upper part of the vertical line into 3 parts. Draw a trailing line to help you better visualize the separation. The first part of the waistline should be approximately the length of the top of the vertical line. The middle part should be slightly longer than the two outer parts described.

Look at the photo below and note the dimensions between the lines of these lines – try to copy this place in your photo.
The Best Fashion Illustration Sketches To Try If You’re A Beginner
4. On the first line from the top, draw another horizontal slanting line in the opposite direction to the hip line. This will be the shoulder line.
Just like you did for the waist line, don’t worry about measuring the shoulder line. The free hand in a continuous line so that it tilts in the opposite direction to the waist line.
To give perspective, one of the ends of the waist line and one of the ends of the shoulder line should point towards each other while the other ends should point away from each other.
As mentioned above, the shoulder line and waist line can hang when it comes to movement. They always have to tilt in the opposite direction to achieve the correct image position. A steeper line has more movement, usually resulting in a more dramatic fashion figure.
How To Draw A Fashion Figure In A Few Simple Steps: Step By Step Guide With Pictures.
As you make different versions, you will be able to find your own style and decide which method you prefer. Sometimes, you’ll find that if you outline a dress with more drape, it will require more movement in your fashion figure, so the waist and shoulder lines will need to slope more.
If, hypothetically, the waist line in the sketch above was slanted in the other direction, then the shoulder line would point in the opposite direction.
Move down to the next line (quite in the middle) and draw a smaller horizontal line that slopes slightly in the same direction as the waistline – This will mark the waistline.

The idea is to make the waist a bit slouchy, but not as slouchy as the waist. In some cases, you can leave this line open.
How To Draw Fashion Figure: Essential Figure Drawing Techniques For Women’s Wear Designers (fashion Croquis)
Remember that the waist line should be shorter than the waist line and the shoulder line. Don’t worry about the exact distance at this point as long as you keep these dimensions in mind.
Note the distance between the waistline and the waistline. Use this half measurement and place a horizontal line along the vertical balance line this distance down from the waist line – this will mark the crotch line. If this sounds a little confusing, use the outline below as a reference.
The crotch line may seem insignificant now, but it will help you a lot when you draw the legs and get the organic shape of the hips.
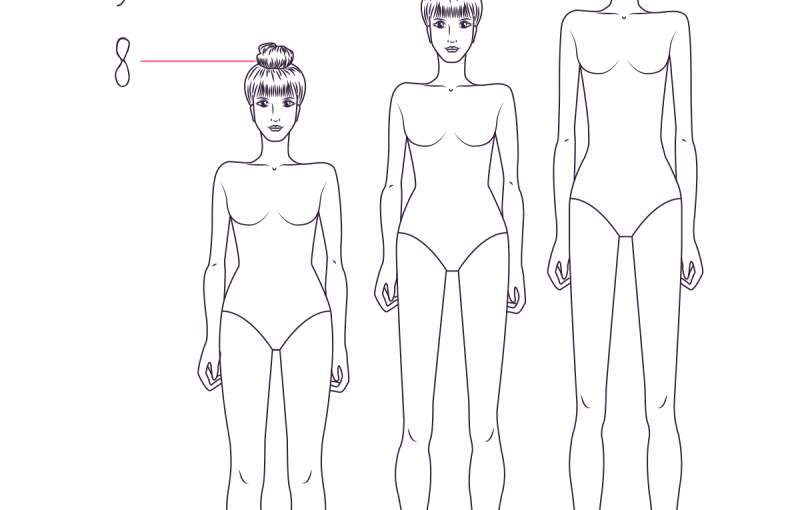
Now to connect the point pieces: You will connect the shoulders to the hips, the hips to the hips, and the hips to the bottom of the dash on both sides of the figure. This will complete the rough design of the body and finally begin to see the fashionable figure emerging from all the lines.
Fashion Body Sketch Step By Step
The shoulders should always be slightly wider than the hips. It’s up to you how much you want to make sure you remember this proportion.
The waist can be as thin or as wide as you like. For a more dramatic fashion image, you can make the waist very thin.
It helps to draw a small marker (vertical line) on the horizontal line to record how wide you want your shoulders, hips and waist to be.

Once you’ve noted these marks, connect them with a continuous semi-curved line: It’s easiest to go from the shoulders to the hips and from the hips down to the hips on both sides, as shown in the image below.
A Beginner’s Fashion Sketch
8. Starting from the side waist, draw a semi-curved line (with the open curve down) to the edge of the bottom line (crotch line). Repeat this step on both sides of the hips.
Near
How to draw figures for fashion design, learn to draw fashion models, learn how to draw body figures, how to draw fashion figures, learn to draw human figures, how to draw fashion figures for beginners, learn to draw fashion sketches, learn to draw stick figures, draw fashion figures, learn to draw fashion, how to draw male fashion figures, learn to draw figures
A fashion designer...